
 This project is a favorite of mine from last year for second and third graders. What parent wouldn't want a lovely fall collage hanging in their house for Thanksgiving/Harvest?!
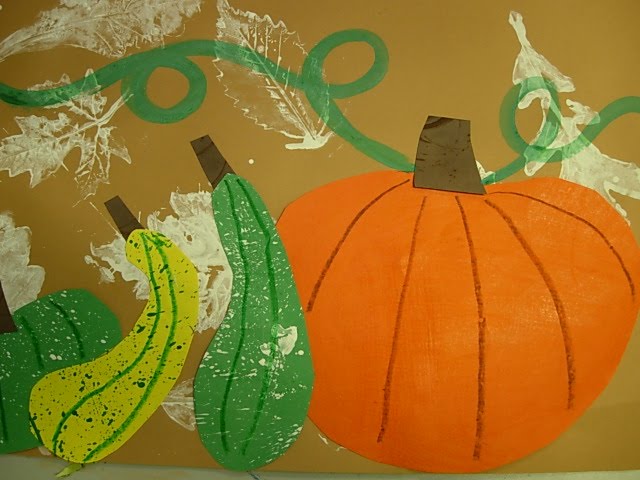
Day one is all about prepping the different papers. To get all the different elements, I set up stations on Day 1 of the project. I have 9 tables in my room and every other table had a station set up at it. Of course you can set up your own, these are merely suggestions for how to get some great Eric Carle-style papers for the collage.
Station 1: texture rubbings--red orange crayon on 9x12 orange paper (for big pumpkin)
Station 2: splatter box-- green paint on 6x9 yellow paper (for squash)
Station 3: finger-flick splatter-- white on two 6x9 green papers (one for squash, one for small pumpkin)
Station 4: White paint with leaf stamps on brown 12x18 paper (for background)
 Day two is all about the assemblage: Draw and cut out squash, gourds, pumpkin, stems (from dark brown paper) and draw lines on them to represent the texture. Use green paint to make an interesting green vine attached to the pumpkin.
 Some kids had extra time so they cut more out of the green papers and added leaves to the vine or to the pumpkins. Some used scrap red, orange, or yellow pieces from the scrap bin to make some maple leaves floating by.
 We hung these around our school and in the local Publix. They were so popular and looked GREAT!
No comments:
Post a Comment