Not to toot my own horn or anything, but I have this great ability to break things down so kids will understand them. I think this is the trick to being a great Art Teacher, in fact...to be able to dissect a piece of artwork so kids understand WHAT to do, HOW to do it, and WHY it will be beautiful in the end. I have so many kid who come to me and tell me they're
not good artists. It kills me. Why do they feel this way? Because their work doesn't look like anyone else's? Because they can't draw?
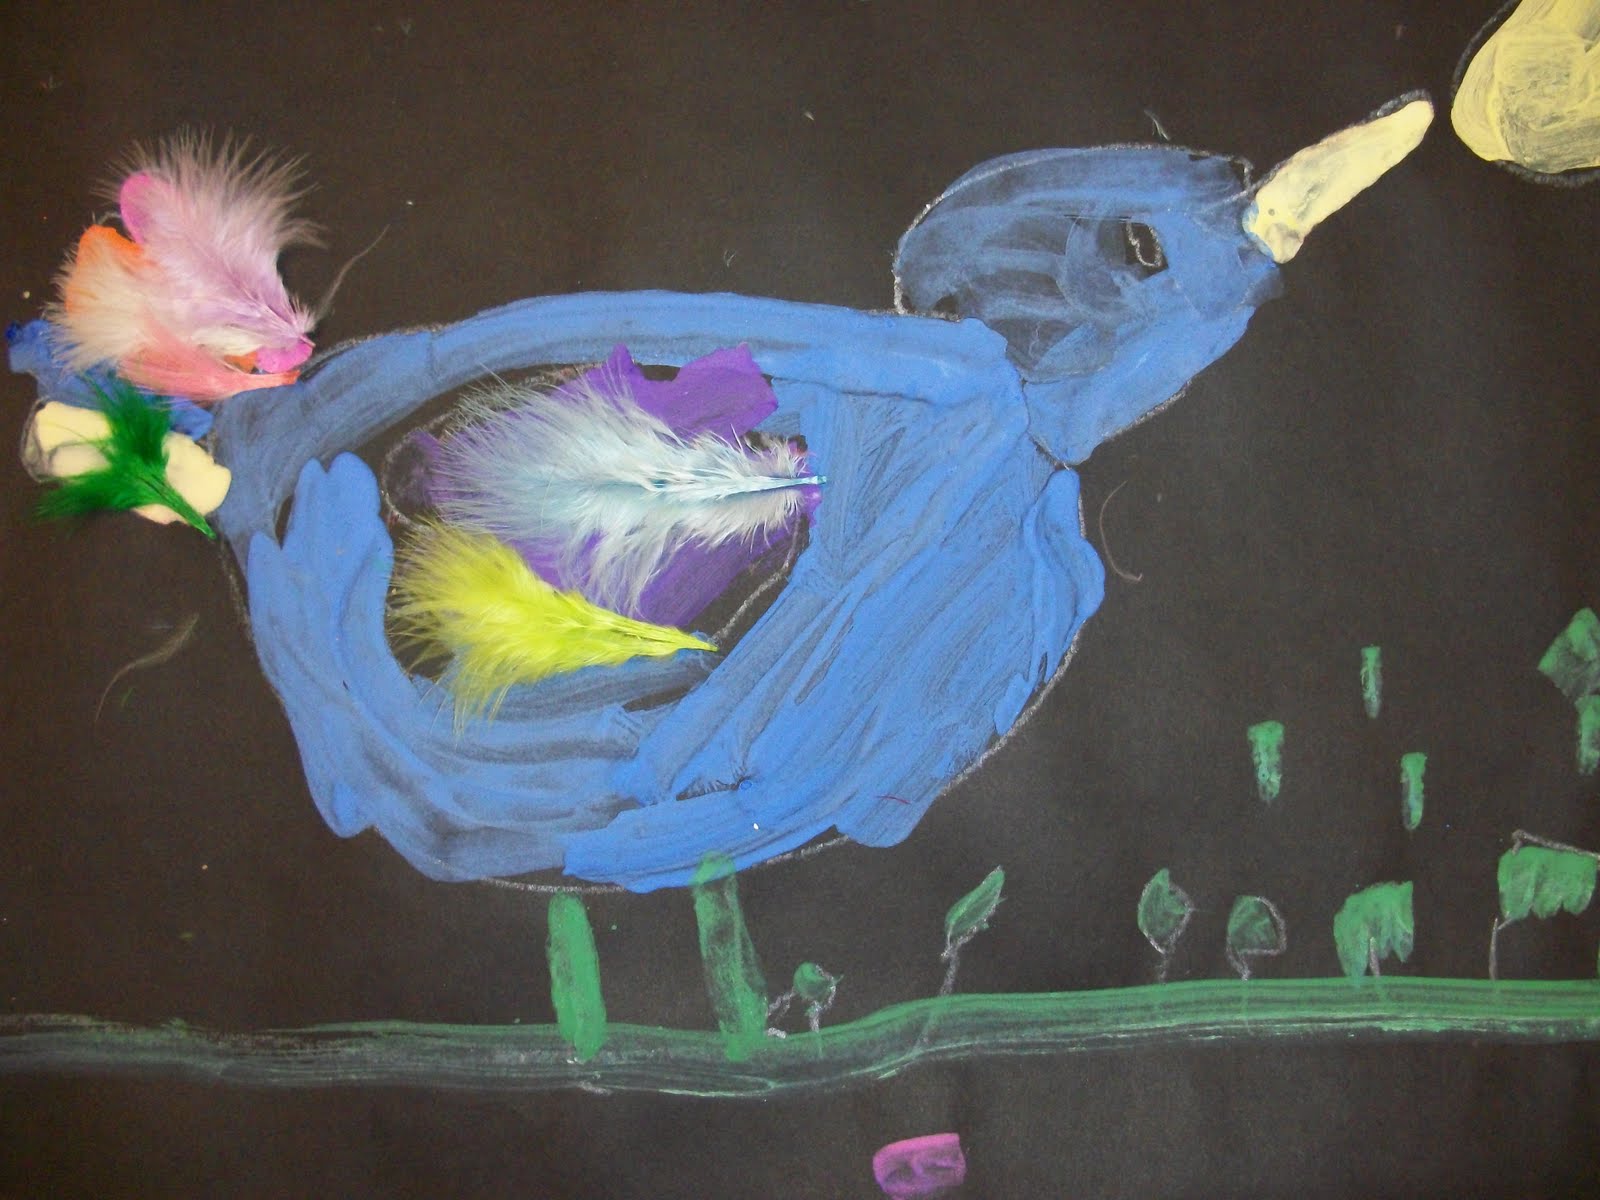
I did these multi-media birds with my Kindergartners. We started with drawing with white crayon on black paper. They knew there were only two chances to get it right...the front and the back of the paper. If they "messed up" on both, they had to figure out how to "dress up their mess-up" and make it work.
I told them we'd be making a bird out of some letters in the alphabet. Really?! They know how to make the letters of the alphabet!
To start, make a large D laying on it's side in the middle of the paper. A smaller D inside will make the wing. A letter O will make the head, and another O inside will make an eye. A sideways letter V will make the beak and an upside-down letter v will make the wing peeking out from the other side. Two upside-down letter Y's will make the feet. Draw a branch and some leaves...and a moon in the sky :)
I used tempera paints with a little white mixed in it. This really popped on the black paper!
On day two we added the feathers for the wings and tail. If I did this project again I think i would also give them some sequins for a more folk-sy look, almost like Mexican folk art birds.
Here are some Kindergarten examples!


 I couldn't wait to start doing winter-ish lessons with my Kindergartners and First Graders. There is such a level of excitement when you make snowmen, snowflakes, reindeer, and Santas. I found this project on Artsonia and added my own little twist on it, incorporating the use of felt and (what was I thinking?!) GLITTER! They've turned out so cute!


 Kimmy Cantrell


 George Rouault


 Happy Veteran's Day from our school to yours! Yesterday was our annual Veteran's Day assembly and I thought I'd share with you a few of the highlights!
 Our Music Teacher, Carol Tausan, had rehearsed with the students for months, and one of their favorites was "God Bless the USA" which included a beautiful slide show. I love these shots of her directing the kiddos.

 The conductor of the Venice Civic Band wanted the students to clap along to the music...
 ...of course they obliged! Anything to squirm and make more noise!


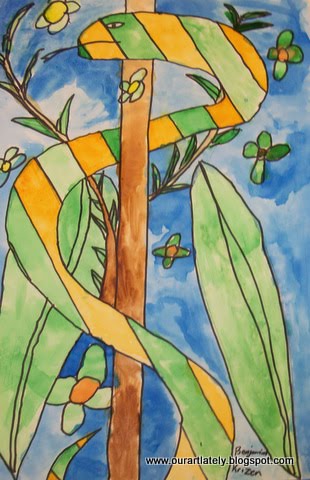
 This is a great project I did with my fourth graders to teach them about overlapping. It is also a great project to teach kids about the power of MISTAKES while making art. As you can see on some of my examples here, some of these snakes have some....er...issues. Some of the students didn't realize they made a mistake until after they were through tracing in Sharpie and started painting...in some cases, tears flowed.
  The great news is, though, that you probably wouldn't have even noticed they had made mistakes unless I pointed them out, right?! It gave me a perfect starting-off-point to focus on emphasis...to take the viewer's eyes off the mistake and onto another part of their painting! In most of their cases, they added some extra-snazzy designs to the snake's body and used brighter, bolder colors.