
 This project was...
...honestly the most fun my Kindergartners have EVER had making a project.
...their "most favoritest project in the world"
...an insane amount of prep for me, but worth every minute
...good for putting a HUGE dent in my stash of soda bottle caps!
PREP:
A few years ago I asked students to save bottlecaps. I had millions of them, and I stored them. Why? Because I am an art supply hoarder.
Ahem.
I had this brilliant idea to make snakes out of them, so I had my husband painstakingly drill holes in (not kidding, really) about 3,000 of them.
Yes, we are still married. Yes, he still speaks to me.
 MATERIALS NEEDED:
1 piece floral wire, about 20" long
pre-drilled bottlecaps
various pony beads
various sized buttons
"googly" eyes
wire-cutters (optional---we used scissors)
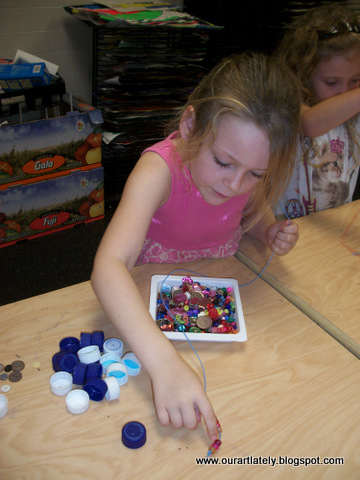 To start, I had each student tie a knot at the end of their wire. They then used 8 beads to string on and make the tongue.
 We then re-examined PATTERN and how we could use pattern to make our snake. Each student had 20 bottlecaps and strung them on in an A,B,A,B pattern. You can see in the picture above, it is important to string them on upside-down. You will see this at the end, as you have to glue the eyes on the top of the lid (it will make sense, I promise!)
 When you get to the last bottlecap (#20), you must put it on backwards. This is the back of the snake. Next, it's time to make the "rattler". We do this using buttons! Students choose 8 buttons and sort them from largest to smallest. They then string them on large to small (so it looks like a rattle), tie a knot to end the snake, and clip any remaining wire off.
 I gave them some colored Sharpies to color patterns or lines on the white bottlecaps.
 See the front of this snake? This is the direction you must string them on so you can glue the eyes on. Not really sure why this student insisted on making black eyes, but whatever!
 They named them and played with them. They absolutely LOVED this project, I am NOT kidding! This is the perfect project for Earth Day, or a thematic unit on repurposing products. The kids came in the next week and told me how they had made things at home out of toilet paper rolls and masking tape. I love hearing that kind of stuff, because that tells me they were excited about something we did! You can't hear that enough, right?!
 If you are inspired and start asking your students to bring in bottlecaps, BE YE PREPARED! They will come in droves (especially if you make a prototype and show them what they will be making!)
Happy Creating!


 It takes about 6-8 hours for the macchia to completely dry. When they were dry, we took them off and arranged them on a piece of 8x8 matboard!
 You could
