Thursday, February 16, 2012

tropical birds

I saw these birds on another blog (which one? HELP!!!!) and thought they were so adorable! My fifth graders drew the birds on black paper and traced their lines in glue.


They then used chalk pastel to color the background (and consequently make a HUGE, dusty mess in my classroom!!!)


I love how folk-artsy the birds look, and of COURSE I love the colors!


You definitely need two days for this project, day one is for drawing and tracing in glue (the glue needs about 24 hours to fully dry).


I did a similar project to this last year when my fifth graders made lizards. They really seem to enjoy using these mediums!

Wednesday, February 15, 2012

woven cities

I've been "Pinspired" by some adorable woven houses I've seen on Pinterest by Painted Paper. I've never really used painted paper as adornment for things...but let me tell you---I HAD THE BEST TIME SPONGE PAINTING these papers that we used for our weavings! (yes, I did it, not the kiddos).
For this project we used two 6x9 "looms" (made of paper) to create the houses. The kids then went crazy with the scrap box and used various painted papers, pieces of folia cardboard and oil pastels to create their little neighborhood!


(Would you like to ride on THAT tire swing?! Looks like an insurance claim waiting to happen!!!)


The kiddos then went to town using the splatter box to create their starry sky background. They had so much fun...I love all of the interesting details, and I LOVE the colors!

Pin It

Tuesday, February 14, 2012

happy heart day

Planned chaos. Those words describe this project to a T! (View exhibit A--above--methodical).

And Exhibit B, here, chaotic. Yes, these are my Kindergartners stamping used tissue paper tubes bent into hearts. We taped them to hold their shapes.

They also used crayon to create a "background" of lines!


As my Kindergartners say, "easy peasy lemon squeezy" lesson. Sorry I didn't share BEFORE Valentine's Day. DUH!

Friday, February 10, 2012

making art together

I've posted on the joys and successes my students have had creating collaborative circle paintings before....and I've now posted about the collaborative process on PreK and K Sharing!

Something magical happened while my students were creating these large panels...they innately learned to think like real artists and execute their ideas in a manner I've never seen before. Some students who feel like they "can't" (an inferiority complex I'm really struggling to help MANY of my students overcome, especially in the test-taking grades) now feel like they're accomplished, worthy artists. Thier "piece" has become part of the "whole". It's been one of those teachable moments on so many levels that I wouldn't trade for the world.


I've seen several collaborative murals popping up around the art-blogging world, and one thing has been consistent: the satisfaction the children have for a "job well done" means even more when they create something with their peers!


Please hop on over to see what else I have to say about this...or to post a link to YOUR circle paintings!
Pin It

Friday, February 3, 2012

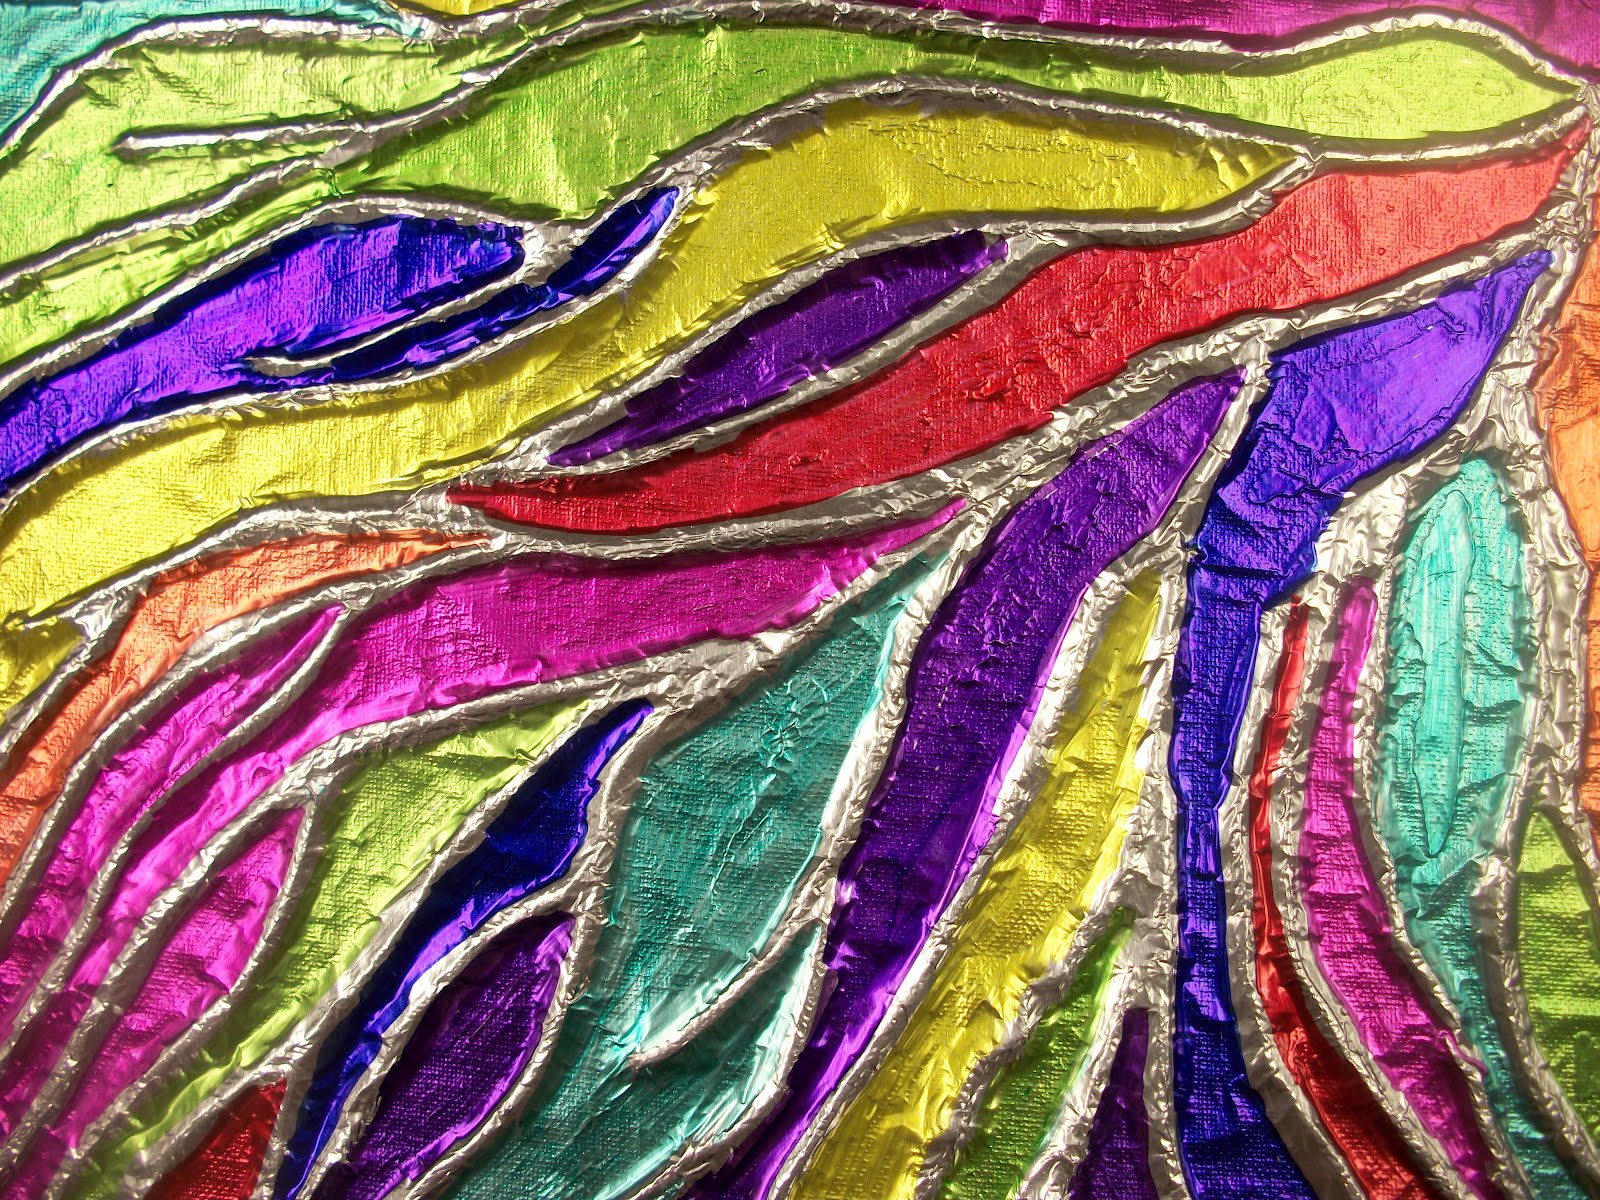
foil embossing

This was a project that ALMOST never "was". I had envisioned something totally different, and was frustrated after I had the students start this and realized it just wasn't going to happen. Long story short, my fifth graders "drew" on canvas with glue and we were going to let the glue dry and paint monochromatically over the top.


It didn't work. I was CRUSHED! ALL THAT MONEY ON CANVAS---we had to salvage them! I saw some foil relief projects on Fine Lines and was so glad I did! She inspired me to have the kids go back over their original design with more glue and add yarn for more elevated designs.


We then used spray adhesive and laid foil over the top. They pressed the foil down around their yarn pieces to create that embossed look.


Lastly, they used colored Sharpies to color the recessed areas and left the embossed "lines" silver.


This was definitely one of those projects that promised to be an epic FAIL, but turned out to be a favorite amongst my fifth graders.


This project was the perfect mixture of perfecting the "process" of making art, along with the glorious "products" created. For a thought-provoking take on the subject of "process-vs-product", I invite you over to PreK and K Sharing for a good read. I hate when projects don't turn out the way I had envisioned....but I am ecstatic these exceeded any expectations I originally had!


Pin It


Somewhat Simple


Tuesday, January 31, 2012

heARTwork, project 2 (first grade)

My first graders just completed these beautiful positive/negative hearts in honor of "Jump Rope for Heart". As complicated as it looks, it was only a two-day project! There are a LOT of different elements in here, but our main focus was on positive and negative space.


On Day 1 we used tissue paper and glue water to create a colorful background (the same technique we used in these hearts).


On Day 2 I gave each child two 6x9 sheets of colored paper (two different colors). We folded them in half like a card and I gave them a 1/2 heart stencil. They traced the stencils and cut out the hearts. Obviously, the negative pieces (the "scraps") were glued onto the paper and the cool tissue paper background peeked through. We did some oil-pastel designs on them to dress them up a bit. For the positive pieces (the hearts) we did some "blottos" (thank you Melissa from the Chocolate Muffin Tree---they loved doing this and I forget sometimes to stick to the basics!) and glued them onto the coloful background caddy-corner from each other. We then added some black accents to make everything POP!


These hearts are making everything very COLORFUL at our school as we prepare for Jump Rope for Heart, as well as Valentine's Day!

Pin It

Wednesday, January 25, 2012

heARTwork, project 1

My younger students (grades K-2) are emulating the work of Jim Dine right now. We have a BUNCH of heart-related things going on at school right now, so while I usually don't like to do "Valentine's Cute"---I thought these would be a great tie-in to all things "heart".

The background has been created out of tissue paper "painted on" with a glue/water mixture. I love this technique because it creates a really cool tie-dye look! Next, the kids used a large (half) heart template to make the black heart (we drew on them with oil pastel first). Then they glued them on to construction paper and used the "fancy scissors" to cut a border around the heart.


I wasn't really sure what I wanted to do for the third heart layer until I saw these from Melissa at the Chocolate Muffin Tree! We cut out the hearts first (using the fold-symmetry technique) and put a little paint inside and pressed. I forgot how much fun that was! I'm sure you could use any sort of painted paper or media for another layer!


Lastly I had them use the leftover tempera to make swirls and lines that radiate from the heart. If they had lots of extra time they used oil pastel as accents.


We did this project in two class periods---one to create the background and the black heart, the second we did all the layering and accents. I did this project with my second graders.


I just love their heARTwork!!!

Pin It