Wednesday, November 3, 2010

Tar Beach Citiscapes

Using literacy as a "jumping-off" point for a lesson is wonderful, especially when you have a self-contained class of ESE students. These students often want to know WHY they are doing something and how it relates to the world (as in "the big picture"). Part of my National Board portfolio focused on how to make art relevant to a student's life, which makes Faith Ringgold's book Tar Beach such a wonderful catalyst for creating artwork!
On day one we talked about the book and where we would go if we could fly. I love how much the answers varied! I gave each of them an 8x14" sheet of white paper (cut into that particular size- you will see why in a minute!) they folded it in half. On the top half they painted a sunset sky (an idea I got from MaryMaking and I just loved how they turned out!) and on the bottom half they used crayon to draw speckled reflections in the "water" using orange, yellow, and pink.

They painted over the crayon in resist-style with watercolor a stripe of yellow, turquoise, blue, and purple. This made the water. Let them dry for a day!

I had some great pads of scrapbook paper and other sheetsof fun papers collected from various places. I chopped them up into 2x2" squares and the kids glued them onto a 12x18 white sheet of paper. The pieces fit perfectly around the edge. I had them do this first. This will be their "patchwork" around their citiscape and also frames it out so nicely!

Using black tempera (and NO PENCILS! Gasp!) they painted their citiscape in black. They used the back end of their paintbrush to stamp the white and yellow lights in the windows.
Typically, I would have had them draw or paint themselves flying over the city- but these are ESE students and they just wouldn't want that so we kept it simple. I LOOOOVE how they turned out. So honest, and so awesome!

Tuesday, November 2, 2010

Happy Election Day!

In light of Election Day and Veteran's Day, I decided to do some iconic American artwork to liven up our school for the Veteran's Day assembly! I've done this "Lady Liberty" project before and each child gets such great results from their artwork, it was definitely one I put in my "vault" for another round!

First, I did a step-by-step drawing with the kids using green oil pastel on green 12x18 paper. I did not allow them to use pencil first, I wanted "honest" drawings! Students then used white for highlights. We cut them out and glued them onto a sheet of 12x18 white paper that we prepped using 2 analogous colors of chalk to blend and make a background.
While each one represents the same icon of Americana, each one has it's own personality. They're SURE to be a hit with our veterans next week! Can't wait to get them up for all to see!

Monday, November 1, 2010

Kindergarten's Composition VI

This is a project inspired by Wassily Kandinsky's Composition series of paintings. I have done this project two ways: one with bleeding watercolors in the background and this one which is done with bleeding tissue paper for the background. Both turn out equally as gorgeous!

We discuss Kandinsky and how he used music as an inspiration for his paintings. As he worked with a composer, his paintings depict the tones and tempos heard in the music. On day one we dedicate the entire class period to painting the background. Of course with the tissue paper I tear all the pieces up and the kids use glue water to "paint" on top of the tissue to make it stick and bleed into the other colors. This usually takes the entire class period.


On day two we take a vote on what kind of music we will listen to while we paint. On this particular day the kids voted on a violin concerto. While the music is playing, the kids use ONLY black paint to "paint what they hear". As you can see on the painting above, she painted long, swirly lines--most likely depicting the long runs you would hear in the concerto.


Whether or not the kids "get it" every one of these projects turns out awesome and SO colorful! These are definitely a favorite every year!


PreK + K Sharing

Saturday, October 30, 2010

Fall Collage

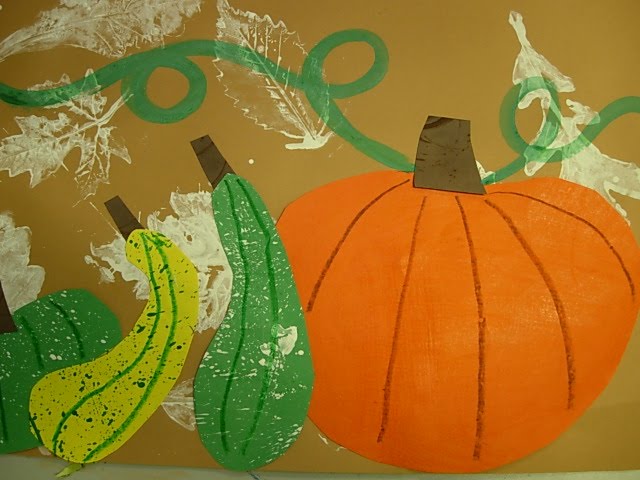
This project is a favorite of mine from last year for second and third graders. What parent wouldn't want a lovely fall collage hanging in their house for Thanksgiving/Harvest?!

Day one is all about prepping the different papers. To get all the different elements, I set up stations on Day 1 of the project. I have 9 tables in my room and every other table had a station set up at it. Of course you can set up your own, these are merely suggestions for how to get some great Eric Carle-style papers for the collage.

Station 1: texture rubbings--red orange crayon on 9x12 orange paper (for big pumpkin)
Station 2: splatter box-- green paint on 6x9 yellow paper (for squash)
Station 3: finger-flick splatter-- white on two 6x9 green papers (one for squash, one for small pumpkin)
Station 4: White paint with leaf stamps on brown 12x18 paper (for background)

Day two is all about the assemblage: Draw and cut out squash, gourds, pumpkin, stems (from dark brown paper) and draw lines on them to represent the texture. Use green paint to make an interesting green vine attached to the pumpkin.

Some kids had extra time so they cut more out of the green papers and added leaves to the vine or to the pumpkins. Some used scrap red, orange, or yellow pieces from the scrap bin to make some maple leaves floating by.
We hung these around our school and in the local Publix. They were so popular and looked GREAT!

Thursday, October 28, 2010

Hot Dogs and Cool Cats

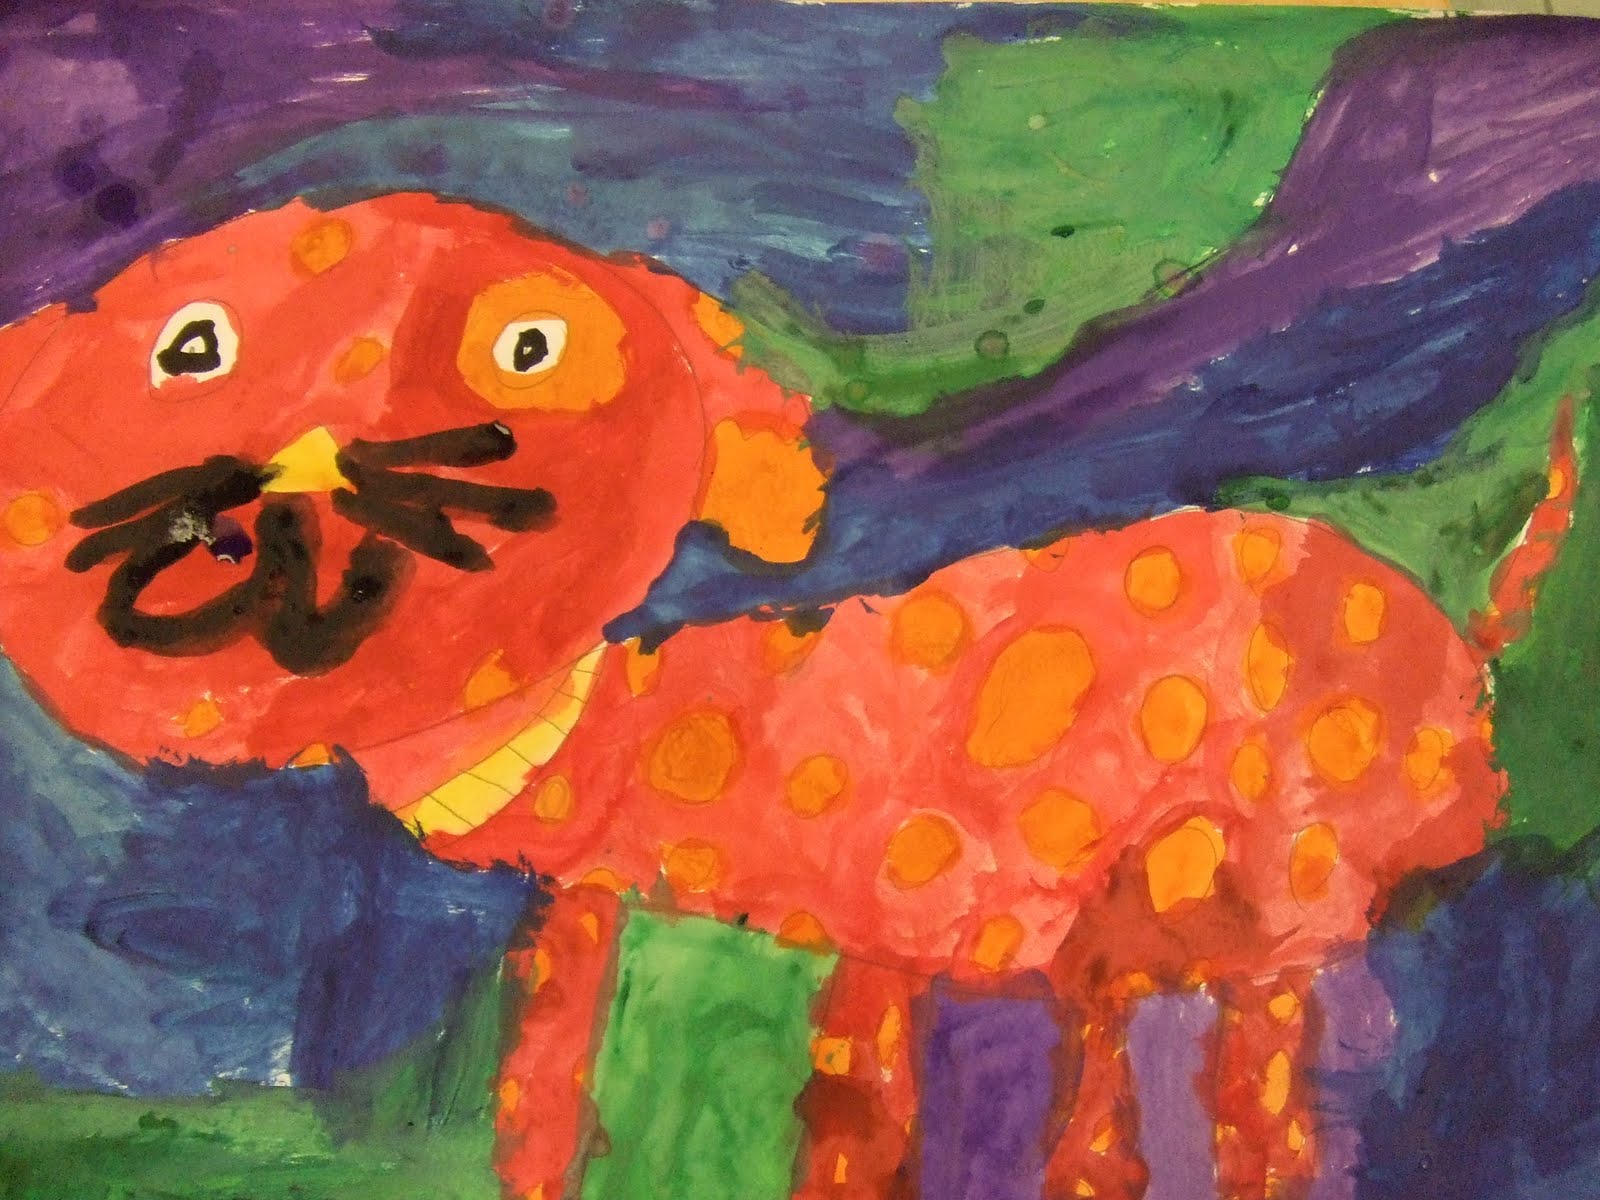
There are a ton of fun projects to do with the kiddos on color scheme. This one gets them every time because of the verbal pun :) The project is pretty self-explanatory, just thought I'd throw the idea out there!

I do this project with Kindergarten and First Grade and it really makes them giggle! I'm a big fan of using tempera block paint with my little guys, so that is the paint that was used here. Of course you could use liquid tempera, watercolor, even crayon! They are to make some sort of abstract background using the opposite color scheme. The possibilities are endless...


Tuesday, October 26, 2010

Stella's Shapely Canvases

Inspired by Frank Stella's The Science of Laziness, I decided it was time to clean out that matboard stash I have in the corner of my room! Someone asked me to cut a mat for them a few weeks ago and I knocked over my box of pieces and parts that were BEGGING me to do something with them!Frank Stella was an American Minimalist artist known for using shaped canvases. While some of his "pieces and parts" had different patterns, etc on them, I wanted to keep the colors simple and BOLD!
I took my largest pieces of matboard, flipped them over onto the backside (the white side) and spray-painted them bold colors. Trust me, it is easier this way! After they were dry, I took them to my cutting board and went to town. I chopped them up into about a million pieces (I figured each student would use 20 or so...you do the math!!) and put a variety of them in plastic bags on each table. DO NOT attempt to cut them all up into small pieces and then spray paint them. You will drive yourself nuts and your husband will curse you for having red, orange, and purple grass a month later! Not that I know or anything...
I gave each student a 6"x6" scrap piece of matboard which would be their "canvas". Of course some of these colored pieces would hang off of their canvases, which was the desired effect!

I also had small squares of posterboard cut up for the kids. I wanted them to be able to cut the posterboard into smaller pieces to add to their project in the negative areas. This also gave them some practice manipulating scissors to make geometric shapes.

I did not initially put glue on the tables for them because I knew they would be quick to glue things on to rush. I wanted them to take their time, experimenting with different sizes, colors, and locations of their shapes. I wanted them to take creative license with their artwork and not make hasty decisions. After about 15 minutes while they created I finally put the glue on their table.

Some got really creative and used lots of shapes. Others had a hard time with the whole thing. I think it was the "containment" issue- they didn't want to go off the canvas!

Either way, I love the way all the projects turned out! They're colorful, artistic, creative, and FUN!

And thankfully, my matboard hoarding obsession has found new purpose!

Happy creating!

Saturday, October 23, 2010

Secondary Handmade-Paper Pumpkins

I do this project with my Kindergartners and First Graders as a part of learning about Primary colors and Secondary colors. And golly-gee-willikers it ties in with Halloween*.

*You might think that I'm big on Halloween, but I definitely could care less. The kids, however, love love love love Halloween and so sometimes I oblige. As long as I can tie a project into our curriculum, I don't care what the subject matter is...even if it is HALLOWEEN!!!

Materials:
1 Sunday stack of newspapers for each child
1 top part of a styrofoam cup cut off (for the dekkle mould, it is the perfect size!)
1 sponge for each student
TONS of scrap colored paper:
red and yellow
yellow and blue
blue and red
old blender
bins for pulp
sta-flo starch (to keep it from sticking to the newspaper!)

I have some scraps paper (let's start with red/yellow and of course you just repeat this for each color...you will need the most of the orange--for the pumpkin--and you will obviously make orange first!) soaking in a bin of water. I put some red and yellow in the blender with some water, take some predictions on what color you will get, and blend away! Give each child a handful of pulp. Put the mould on top of the newspaper and fill it in. Press and blot with sponge. Teach the students how to squeeze excess water out of the sponge. Take the mould off.

Next will be to blend blue and red (for the facial features...if you don't care to make facial features, you could use the purple to make the textured lines of a pumpkin). Again, press and blot, press and blot.

Last will be the yellow and blue (for the green stem). Be sure the stem overlaps the pumpkin a bit so it attaches to it and they dry together!

Allow to dry (probably 24-48 hours unless you put them outside in the sun) and they should peel right off the newspaper. The starch will make this happen!

We glued our pumpkins onto black paper, added stars and fringed grass and they look GREAT! The kids love this, I could make a curriculur tie-in, and it's "recycling". A win on all fronts! Have fun!